
JUMP TO RECIPE
JUMP TO PHOTO GUIDE
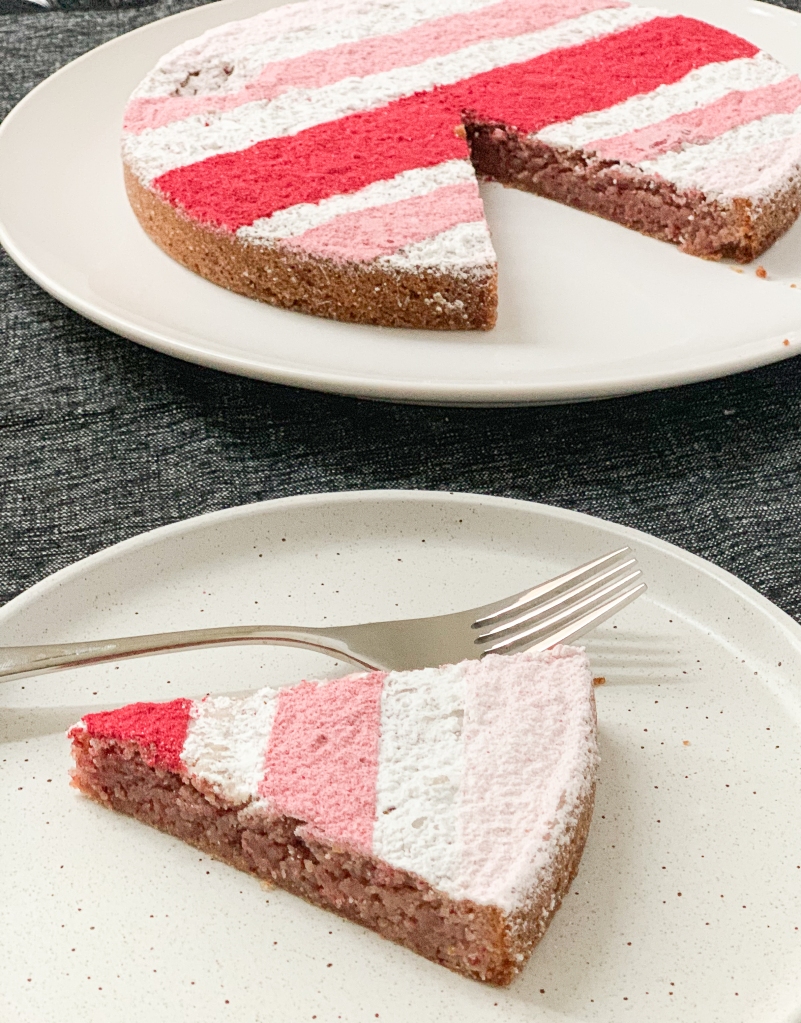
This here is one of my favorite cakes. I called it “sneaky” because though it looks quite simple, it’s packed with much more flavor than you’d expect from a single layer cake with no frosting, jazzy fillings or swirls. Pleasantly dense and never “too much”, you’ll want to eat seconds…or thirds, guaranteed. This cake also a great way to get a raspberry fix in the middle of winter here in the U S of A. And because of it’s pretty pink color, I thought it’d be great to share in time for Valentine’s Day. Of course, this Sneaky Raspberry White Chocolate cake is just as delicious and quite charming “naked” so don’t let my powdered sugar shenanigans deter you.
If you give it a go, I’d love to see it! You can tag me or Instagram or send me a message @letsgosho #letsgosho

Kladdkaka FTW
This cake is a riff on a riff of a traditional Swedish Kladdkakka cake. Kladkakka is a dense, gooey Swedish chocolate cake. I came across a recipe for White Chocolate Kladdkaka last year and was immediately drawn to the notion of a simple, buttery white chocolate cake. I had the idea of adding dehydrated raspberry powder to the mix, and once I gave it a try, I never looked back.
Why It Works
You get the contrast of bold and tart raspberry flavor and buttery vanilla undertones. The lemon zest and vanilla reinforce the fresh and creamy elements of the cake. It’s like having a berry garnish and cake in one. The cake is a tender, dense and almost brownie-like in texture, but it’s not gooey. I’ve never had anything quite like it and I’m guessing you haven’t either. The ingredients are simple and it comes together pretty quickly so it’s a great one for the low maintenance baker (that’s usually me).
To The White Chocolate Skeptics

If you’re not typically a white chocolate fan, I encourage you to give it a chance melted in cake form. The flavor doesn’t scream “white chocolate” but it adds a lushness to the cake that is very appealing.
Berries & White Chocolate
You can find freeze dried raspberries at Trader Joes, Target, Whole Foods and many other grocery stores. They also sell freeze dried raspberry powder online which cuts the step of pulverizing the berries yourself.

Try to use actual white chocolate for this recipe as opposed to the “white chips” you often find in grocery stores (ehm, Nestle). These chips typically contain little if any cocoa butter. You want the cocoa butter in this cake to impart flavor.
I tested this recipe with Lindt and Green & Black white chocolate bars. Both are good, but Green & Black is sooooo delicious. It’s one of the few chocolates I could eat straight up as a bar.
Let’s Go Sho fun fact: one of my diet’s saving graces is that fact that I don’t really care much for chocolate bars on their own. I can keep them in my house without a 2nd thought… unless times are really hard. But a chocolate-y baked good? It doesn’t stand a chance! I will wake up ready to eat it till it’s all gone. That’s why I’m also pushing baked goods on friends and coworkers. It’s a win win.
Cake Art Deco
I started decorating the cake because each time I made it, I would do something to mess up the shiny crackly surface – thumb print, rack marks, etc. Why?! Turns out I liked the look of more raspberry powder on top though, so I kept going with it. This time I made a low key Valentine’s Day inspired stripe design. In hindsight, I think I would have forgone the white stripes and just let the colors overlap for a gradient effect. My hands are shaky – ya gotta play to your strengths. I’m great at blending! The options are endless, and you can get some pretty cool effects with far less parchment paper and precision.

To you create your own decoration with similar colors you’ll need:
- extra freeze dried raspberries (0.5 -1 oz depending on the design)
- parchment paper
- powdered sugar
- small sieve ( I used a tea strainer)
- small bowl(s)
Decorating Guide

Sift out seeds. 
Get bowls for each color 
Add berry powder to make different shades. 
Use parchment paper as a stencil. 
Fill a mesh strainer w/lightest color sugar. 
Sift over cake. 
Use parchment to create zones. 
End with darkest color. 
Lift parchment strips straight up to remove them from cake.
Sneaky Raspberry White Chocolate Cake

This unassuming little pink cake will surprise and delight you. It’s rich and fudgy thanks to the white chocolate yet full of bright, tart raspberry flavor.
You can find freeze dried raspberries at Trader Joes, Target, Whole Foods and many other grocery stores. Look for real white chocolate which contains cocoa butter.
Ingredients
- 11 tablespoons (150 g) butter plus extra for greasing the pan
- 5.3 oz (150 g) real white chocolate (ex. Lindt, Ghiradelli or Green & Black bars)
- 2 eggs
- ¾ cup white sugar (150g) sugar plus extra for dusting the pan
- 1 teaspoon vanilla extract
- 1 oz freeze dried raspberries (see note above)
- 1 ¼ cups(150 g) all-purpose flour
- 1/2 tsp salt
- zest of one lemon
Equipment
- hand or stand mixer (w/whisk attachment if you have one)
- 9-inch round cake pan
- 2 medium bowls (for melting butter and mixing dry ingredients)
- small plate (that covers opening of the bowl)
- parchment paper
- rolling pin or wine bottle (to crush the raspberries)
- sealable plastic bag
- large bowl (to mix batter)
- knife (to cut chocolate)
- rubber spatula
- measuring cup
- measuring spoons
- zester
Directions
- Cut a circle of parchment paper to line the bottom of the cake pan. (I start with a rectangular piece and press into the bottom of the pan to form creases that I use as a guide for cutting a circle.) Grease the sides of the pan with butter. Sprinkle in a couple tablespoons of sugar and shake it around so it sticks to the sides. Dump out any excess sugar and place the circle of parchment in the bottom of the pan. Preheat the oven to 350 degrees F.
- Chop the white chocolate. It doesn’t need to be pretty. You just want smaller bits so it melts quickly. Zest the lemon and set it aside. Zest the lemon and set it aside.
- Place the butter in the microwaveable bowl. Cover the top of the bowl with the piece of parchment paper, top it with a plate and microwave for 1 minute then 20 sec intervals until it’s melted. (The plate and parchment keep the butter from splattering in the microwave.) Once the butter is melted, stir in the chopped white chocolate until it’s melted and combined with the butter. Set it aside to cool slightly.
- Place the raspberries in the plastic bag and use the rolling pin/bottle, crush them into a powder. (There will be some seeds. I leave them in, but you can sift the powder through a fine mesh sieve to remove them if you desire.) In the medium bowl, combine the raspberry powder with the 1 ¼ cups flour and ½ teaspoon of salt.
- Beat the eggs and sugar together in the mixing bowl until the mixture is a pale yellow and and has increased in volume. This may take 7 minutes or longer. (Light and fluffy here is important because the tiny bubbles that form here is what provides rise to the cake.)
- Use the spatula to fold in the 1 tsp of vanilla then chocolate mixture (give it a stir it first if it’s separated) into the eggs/sugar mixture. You want to be gentle to keep those bubbles. Make sure to scrape the bottom and sides so everything is incorporated.
- Add the lemon zest to the mixing bowl along with about half of the raspberry/flour mixture and gently mix it in before adding the remaining raspberry/flour. Pour the cake batter into the pan and smooth the top with the spatula.
- Bake the cake for 20-25 minutes. I like to rotate the pan 180 degrees about halfway through. It’s done with the edges are golden brown and beginning to pull away from the pan. 9.Once the cake is just a little warm, you can use a butter knife to go around the edges to loosen it. I like to shake the cake side to side and make sure it moves freely. Then you can tip the cake out of the pan and let it cool completely. From here, you can dust it with powdered sugar or raspberry powder if you fancy. Enjoy!
Photo Guide

Ingredients 
Grease & sugar pan. 
Crush the berries 
Chocolate , berries & zest 
Melt butter. 
Melt chocolate in warm butter. 
Mix flour, berries and salt. 
Beat eggs and sugar until light & pale. 
Add vanilla & chocolate mixture. 
Fold in raspberry flour. 
Smooth batter in pan. 
Bake until the edges are golden brown.


This looks amazing!
LikeLike
Thanks! It’s one of my favorite favor combinations
LikeLike
I can’t wait to try it
LikeLike
Yay! I hope you do.
LikeLike